主夫在宅パートのeitoballです。レガシーといえば、StarCraft IIの新作Legacy of the Voidの発売が待ち遠しいこの頃です。
はじめに
Pragmatic Programmerで、Dave Thomasさんは、1年に1つ新しいプログラミング言語を学ぼうと提唱しています。1年ごとではないですが、時折、新しい言語を学んでいますが、ここ最近学んだ言語ので、Elixirは、とても気に入っており、できるだけ使っていこうと思っています。
今更ですが、React.jsをElixir製のWebフレームワークであるPhoenix Framework(以下、Phoenix)上で動かしながら学ぶことにしました。このフレームワークが開発中のためか、React.jsを動かす例などは見つからない、もしくは、古くて動かないため、今回、最新版(0.13.0)で動くようになったので、その手順を共有したいと思います。
React.jsを動かしてみる
React.jsを動かしてみたいと思います。今回の結果は、https://github.com/eitoball/react_phoenix_demo にて公開しています。
0. 前提条件
Phoenixのバージョン0.13.0が、動作するようになっていることが必要です。まだ、そのようになっていない場合は、ここを読んで、環境を整えて下さい。
上記のレポジトリにDockerfileを用意しており、dockerで簡単に環境を構築することができます。また、Docker Hubにてeitoball/react_phoenix_baseというdockerイメージを使うこともできます。
$ docker pull eitoball/react_phoenix_base
$ docker run -it -p 4000:4000 -v `pwd`:/home/sample/sandbox eitoball/react_phoenix_base /usr/bin/tmux
1. アプリケーションを作成
Phoenixのアプリケーションを作成します。ターミナルで以下のようにコマンドを実行します。
$ mix phoenix.new react_phonenix
...
Install mix dependencies? [Yn] # returnキーを押す。
* running mix deps.get

Install brunch.io dependencies? [Yn] # returnキーを押す。時間がかかります。
* running npm install

We are all set! Run your Phoenix application:

    $ cd react_phoenix
    $ mix phoenix.server

You can also run it inside IEx (Interactive Elixir) as:

    $ iex -S mix phoenix.server
cd react_phoenixで移動だけして下さい。
ここまでの結果は、https://github.com/eitoball/react_phoenix_demo/commit/9bfab6ebb21d16f11342c86ee277dbfee41fbda5 になります。
2. React.jsをインストール
Phoenixでは、brunchを使って、静的なアセットをビルドしています。brunchでは、JavaScriptライブラリなどをbowerを使って管理します。React.jsをインストールするには、以下のコマンドを実行します。
? May bower anonymously report usage statistics to improve the tool over time? (Y/n)と聞かれる場合があります。使用状況を送信したくない場合は、nキーを押して下さい。送信しても構わない場合は、enterキーを押して下さい。
bower not-cached    git://github.com/facebook/react-bower.git#*
bower resolve       git://github.com/facebook/react-bower.git#*
bower not-cached    git://github.com/jquery/jquery.git#*
bower resolve       git://github.com/jquery/jquery.git#*
bower download      https://github.com/facebook/react-bower/archive/v0.13.3.tar.gz
bower download      https://github.com/jquery/jquery/archive/2.1.4.tar.gz
bower extract       jquery#* archive.tar.gz
bower resolved      git://github.com/jquery/jquery.git#2.1.4
bower extract       react#* archive.tar.gz
bower resolved      git://github.com/facebook/react-bower.git#0.13.3
bower install       jquery#2.1.4
bower install       react#0.13.3

jquery#2.1.4 bower_components/jquery

react#0.13.3 bower_components/react
ここで、以下のようにコマンドを実行して、bower.jsonを作成して、依存性を記録しておきます。色々、質問されますが、リターンキーを押していけば大丈夫です。わかる方は適宜入力して下さい。
$ bower init
? name: (react-phoenix)
? version: (0.0.0)
? description:
? main file:
? what types of modules does this package expose? (Press <space> to select)
❯◯ amd
 ◯ es6
 ◯ globals
 ◯ node
 ◯ yui
? keywords:
? authors: (eitoball)
? license: (MIT)
? homepage:
? set currently installed components as dependencies? (Y/n)
? add commonly ignored files to ignore list? (Y/n)
? would you like to mark this package as private which prevents it from being accidentally published to the registry? (y/N)
{
  name: 'react-phoenix',
  version: '0.0.0',
  authors: [
    'eitoball'
  ],
  license: 'MIT',
  ignore: [
    '**/.*',
    'node_modules',
    'bower_components',
    'test',
    'tests'
  ],
  dependencies: {
    react: '~0.13.3',
    jquery: '~2.1.4'
  }
}

? Looks good? (Y/n)
ここまでの結果は、https://github.com/eitoball/react_phoenix_demo/commit/c5cb619a31d01176d5845c9ff64fa206a9722870 になります。
3. 表示用のコントローラ・ビューを作成
コンテンツを表示するためのコントローラとビューを作成します。コントローラは、web/controllers/hello_world_controller.ex として、以下の内容で作成します。
defmodule ReactPhoenix.HelloWorldController do
  use ReactPhoenix.Web, :controller

  plug :action

  def index(conn, _params) do
    render conn, "index.html"
  end
end
ビュークラスは、web/views/hello_world_view.exで、以下の内容になります。
defmodule ReactPhoenix.HelloWorldView do
  use ReactPhoenix.Web, :view
end
テンプレートファイルは、web/templates/hello_world/index.html.eex(拡張子に注意)で、以下の内容になります。
<h2>HelloWorld#index</h2>
最後にweb/router.exに1行追加します。
scope "/", ReactPhoenix do
  pipe_through :browser # Use the default browser stack

  get "/", PageController, :index
  get "/hello_world", HelloWorldController, :index # この行を追加する
end
ここで、サーバーを実行します。
$ iex -S mix phoenix.server
Erlang/OTP 17 [erts-6.4] [source] [64-bit] [smp:4:4] [async-threads:10] [hipe] [kernel-poll:false] [dtrace]

[info] Running ReactPhoenix.Endpoint with Cowboy on port 4000 (http)
Interactive Elixir (1.0.4) - press Ctrl+C to exit (type h() ENTER for help)
iex(1)> [BABEL] Note: The code generator has deoptimised the styling of "bower_components/jquery/dist/jquery.js" as it exceeds the max of "100KB".
[BABEL] Note: The code generator has deoptimised the styling of "bower_components/react/react.js" as it exceeds the max of "100KB".
18 May 15:40:40 - info: compiled 5 files into 2 files in 8365ms
最後のcompiled 5 files...が表示されたら、ブラウザで、http://localhost:4000/hello_world にアクセスしてください。正しくファイルが追加・変更されている場合、以下のように表示されるます。

ここまでの結果は、https://github.com/eitoball/react_phoenix_demo/commit/6beec786b77d4b1bfd6e49535b52c579740bda4f になります。
4. React.jsを使ったコードを追加
最後にReact.jsを使うコードを追加します。
まず、先ほど、追加したテンプレートファイル(web/templates/hello_world/index.html.eex)を以下のように変更します。
<div id="hello_world"></div>
変更すると http://localhost:4000/hello_world は、以下のようになります。(自動的にリロードされているはずです。)

そして、web/static/js/app.jsのlet App = {の行の上辺りに次のようなコードを追加します。
$(function() {
  React.render(
    <h2 className="jumbotron">Hello from React!<h2>,
    document.getElementById('hello_world')
  );
});
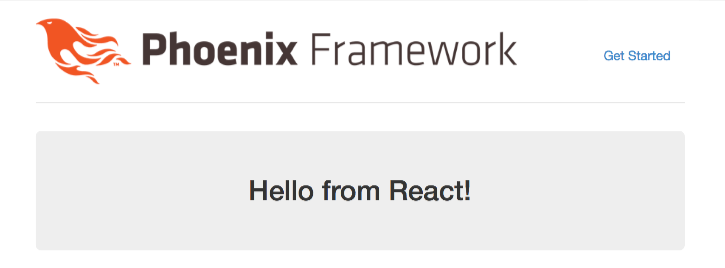
正しく、変更されている場合、以下のように表示されます。

ここまでの結果は、https://github.com/eitoball/react_phoenix_demo/commit/413e8d2894728e6c8d4a9ba48ceecd19ac5c307b になります。
JSX (web/static/js/app.js内の<h2 className="jumbotron">Hello from React!<h2>の部分)は、brunchのbabelプラグインによって自動的にJavaScriptにコンパイルされます。ソースを見ると以下のようになっていることがわかります。
$(function () {
    React.render(React.createElement(
    "h2",
    {
        className: "jumbotron"
    },
    "Hello from React!"
    ), document.getElementById("hello_world"));
});
これで、Phoenix Frameworkで、React.jsを使った開発への準備ができました。
さいごに
最初にも書きましたが、PhoenixでReact.jsを利用することに関しての情報がとても少ないため、また、brunchやbabelなど仕組みがよくわからなかったため、試行錯誤しながら、一晩かけて、やっと、ここまでできるようになりました。次は、React.jsのチュートリアルをやっていこうと思います。